This guide will teach you how to recover and repair a corrupted Microsoft Excel file on your Windows or Mac computer.
Method 1: Repairing the File (Windows Only)
- Ensure You Are Using a Windows Computer
- Repairing an Excel file is only possible on the Windows version of Excel.
- If you are using a Mac, try one of the other methods listed.
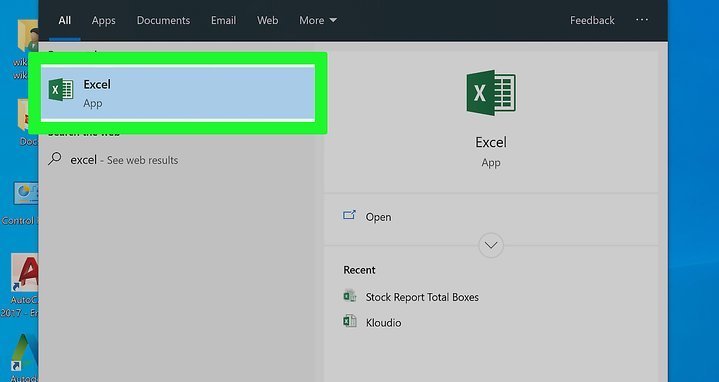
- Open Excel
- The app icon resembles a green box with a white “X”.
- Click “Open Other Workbooks”
- This option is next to a folder-shaped icon in the lower-left corner of the window.
- Click “Browse”
- A File Explorer window will open.
- Select Your Corrupted Excel File
- Navigate to the folder where the corrupted file is stored and select it.
- Click the “Menu” Icon
- It is the downward-facing arrow next to the “Open” button. A drop-down menu will appear.
- Click “Open and Repair…”
- This option is at the bottom of the drop-down menu.
- If “Open and Repair…” is greyed out, make sure the Excel file is selected and try again. If it remains greyed out, the file cannot be repaired.
- Click “Repair” When Prompted
- Windows will attempt to repair your file.
- If this option is unavailable, click “Extract Data” instead, then choose either “Convert to Values” or “Recover Formulas” to salvage any data.
- Wait for the File to Open
- This may take a few minutes if the file is large.
- If the file still won’t open, repeat the process and click “Extract Data” instead of “Repair”.
- Save Your File
- Once repaired, press Ctrl+S, double-click This PC, select a save location, enter a new file name, and click Save.
- Ensure the new file name is different from the corrupted file.
Method 2: Changing the File Type (Windows)
- Understand the Importance of File Types
- Older Excel documents may become unstable on newer versions. Changing the file format to “xlsx” (or “xls” for older programs) can resolve this issue.
- Open Start
- Click the Windows logo in the bottom-left corner of the screen.
- Open File Explorer
- Click the folder-shaped icon.
- Click the “View” Tab
- A toolbar will appear.
- Check the “File Name Extensions” Box
- This option is in the “Show/hide” section of the toolbar.
- Select Your Excel File
- Navigate to and select the document you want to recover.
- Click “Home”
- A toolbar will appear.
- Click “Rename”
- This option is in the “Organize” section of the toolbar. The file name will become highlighted.
- Change the File Type
- Replace the extension with “xlsx” and press Enter.
- For example, change “Spreadsheet1.docx” to “Spreadsheet1.xlsx”.
- If already “xlsx”, try “xls” or “html”.
- Click “Yes” When Prompted
- This will confirm and change the file extension.
- Try Opening the File
- Double-click the file. If it opens in Excel (or a web browser if “html” was used), the file is recovered.
- For “html”, convert it back to an Excel file by dragging the html file onto the Excel icon and saving as a new “xlsx” file.
- If the file won’t open, proceed to the next method.
Method 3: Changing the File Type (Mac)
- Understand the Importance of File Types
- Similar to Windows, changing the file format to “xlsx” (or “xls” for older programs) can resolve compatibility issues.
- Open Finder
- Click the blue, face-shaped app icon in the Dock.
- Select Your Excel File
- Navigate to the folder containing the file and select it.
- Click “File”
- Located in the top-left corner of your screen.
- Click “Get Info”
- This will open a pop-up window.
- Expand the “Name & Extension” Section if Necessary
- Click the triangle next to “Name & Extension” to view the file’s name and extension.
- Change the File Type
- Replace the extension with “xlsx” and press Return.
- For example, change “Spreadsheet1.txt” to “Spreadsheet1.xlsx”.
- If already “xlsx”, try “xls” or “html”.
- Click “Use .xlsx” When Prompted
- This will confirm and change the file type.
- Try Opening the File
- Double-click the file. If it opens in Excel (or a web browser if “html” was used), the file is recovered.
- For “html”, convert it back to an Excel file by dragging the html file onto the Excel icon and saving as a new “xlsx” file.
- If the file won’t open, try another method.
Method 4: Recovering a Temporary Save on Windows
Understand the Limitations
Like most Microsoft Office products, Excel automatically saves recovery versions of files. This means you may be able to restore a partial version of your corrupted Excel document. However, these recovery versions may not always capture the latest changes, and there is a chance you won’t be able to recover the entire document.
Steps to Recover a Temporary Save
- Open Start
- Click the Windows logo in the bottom-left corner of the screen.
- Search for “This PC”
- Type in “this pc” to search for the “This PC” program.
- Open This PC
- Click the computer monitor-shaped icon at the top of the Start window.
- Double-click Your Computer’s Hard Drive
- This is usually labeled as the “OS (C:)” option under the “Devices and drives” heading.
- Navigate to the Users Folder
- Double-click the “Users” folder.
- Open Your User Folder
- This folder is labeled with part or all of your username.
- Locate the AppData Folder
- Double-click the “AppData” folder. If you can’t see this folder, click the View tab and check the “Hidden items” box in the “Show/hide” section.
- Open the Local Folder
- Double-click the “Local” folder.
- Navigate to the Microsoft Folder
- Scroll down and double-click the “Microsoft” folder.
- Locate the Office Folder
- Double-click the “Office” folder.
- Access the UnsavedFiles Folder
- Double-click the “UnsavedFiles” folder.
- Select the Corrupted Excel File
- Look for an Excel file icon that matches the name of your corrupted file and select it. If no files are present, a recovery version wasn’t saved.
- Change the File Extension
- To do this:
- Click View
- Check the “File name extensions” box.
- Click Home
- Click Rename
- Replace the “.tmp” extension with “.xlsx”
- Press Enter
- Click Yes when prompted.
- To do this:
- Open the Renamed Excel File
- Double-click the file you just renamed.
- Save Your Recovered File
- Once the restored file opens, press Ctrl+S, double-click This PC, select a save location, enter a new file name, and click Save. Be sure to use a different file name than the original corrupted file.
Method 5: Recovering a Temporary Save on Mac
Understand the Limitations
Like most Microsoft Office products, Excel automatically saves recovery versions of files. This means you may be able to restore a partial version of your corrupted Excel document. However, these recovery versions may not always capture the latest changes, and there is a chance you won’t be able to recover the entire document.
Steps to Recover a Temporary Save
- Open the Go Menu
- Click the Go menu item at the top of the screen. If you don’t see the Go menu item, first open Finder or click the desktop to make it appear.
- Access the Library Folder
- Hold down the Option key to reveal the Library folder in the Go drop-down menu.
- Click Library.
- Open the Containers Folder
- Double-click the “Containers” folder.
- Search for the Microsoft Excel Folder
- Click the search bar in the upper-right side of the window.
- Type in “com.microsoft.Excel” and press Return.
- Select the Containers Tab
- Click the Containers tab near the “Search:” heading.
- Open the com.microsoft.Excel Folder
- Double-click this folder to open it.
- Navigate to the AutoRecovery Folder
- Open the Data folder.
- Open the Library folder.
- Open the Preferences folder.
- Open the AutoRecovery folder.
- Find a Temporary Version of Your Excel File
- Look for a file with some or all of the name of your corrupted Excel document. If you can’t find it, the file wasn’t backed up.
- Open the Excel File
- Click the Excel file to select it.
- Click the File menu item in the upper-left corner of the screen.
- Select Open With.
- Click Excel. The temporary version of the Excel document will open in Excel. Note that it may not include the most recent changes.
- Save the Document
- Press Command+S, enter a file name, select a save location in the “Where” menu, and click Save.


Add comment